Every long project begins with a few choices that are easy to dismiss and expensive to repair. In this Adventure, you will create the Graves project, give its assets a dependable home, build the first three Levels, and establish the framework that carries the player from startup into the game.
By the end, Unreal will open the correct project and Level, each Level will use the correct GameMode, and the project will have a folder structure sturdy enough to support the work ahead.
Journey 1 — Create the Project
Forge 1 — Start from a clean Unreal project
Open the Unreal Project Browser and choose Games > Blank. Configure the project with these settings:
| Setting | Value |
|---|---|
| Project type | Blueprint |
| Target platform | Desktop |
| Quality preset | Maximum |
| Starter Content | Disabled |
| Project name | Graves |
Choose a writable parent folder, create the project, and let Unreal open it.
The folder containing Graves.uproject is the Project Root. Whenever this Adventure refers to the Project Root, it means that folder—not the Content folder inside it.
Close Unreal and reopen the project from Graves.uproject. If Unreal asks whether to save an unnamed starter Level while closing, choose Don’t Save; the first named Levels are created later in Forge 5. This small test confirms that the project path itself is sound before the project contains anything valuable.
Discoveries
- A
.uprojectfile identifies an Unreal project. The folders beside it hold project content, configuration, source files, and supporting material. - Save All saves assets and Levels that Unreal knows about. It does not protect source artwork stored elsewhere, so that material needs its own organized home.
- A project that cannot close and reopen cleanly is not ready to build on.
Trial — Reopen the project
-
Graves.uprojectopens without an error. - The project is named
Graves. - The project uses Blueprint and does not contain Starter Content.
- The project closes and reopens from the same
Graves.uprojectpath.
If the project opens read-only or refuses to save, move it to a writable location before continuing.
Forge 2 — Settle into the Unreal Editor
You do not need to memorize the entire editor. For now, learn the six regions you will touch constantly:
- Menu Bar: Project-wide commands and editor tools.
- Toolbar: Save, Play, Blueprints, platforms, and other frequent actions.
- Viewport: The visible world you are building.
- World Outliner: A list of Actors in the open Level.
- Details: Properties for the selected Actor or asset.
- Content Browser: The project’s saved assets and folders.
If the Content Browser is not permanently visible, open the Content Drawer and dock it. Ctrl+Space toggles the temporary drawer, which is useful for a quick search but awkward as the only way to browse a growing project.
Select any Actor already listed in the World Outliner and watch the same Actor become selected in the Viewport. Change nothing; just notice that the Details panel now describes that selection. If the starter Level contains no Actors, place one temporary Cube from Place Actors > Shapes, perform this check, and delete the Cube before continuing. This relationship—world object, Outliner entry, Details—is one of Unreal’s most common working patterns.
Trial — Find the working panels
- You can select the same Actor from the Viewport and the World Outliner.
- The Details panel updates to show the selected Actor.
- The Content Browser remains docked after the Content Drawer closes.
Journey 2 — Give Every Asset a Home
Forge 3 — Build the project folder structure
In the Content Browser, create a top-level folder named Graves. All original project assets belong beneath:
Content/Graves
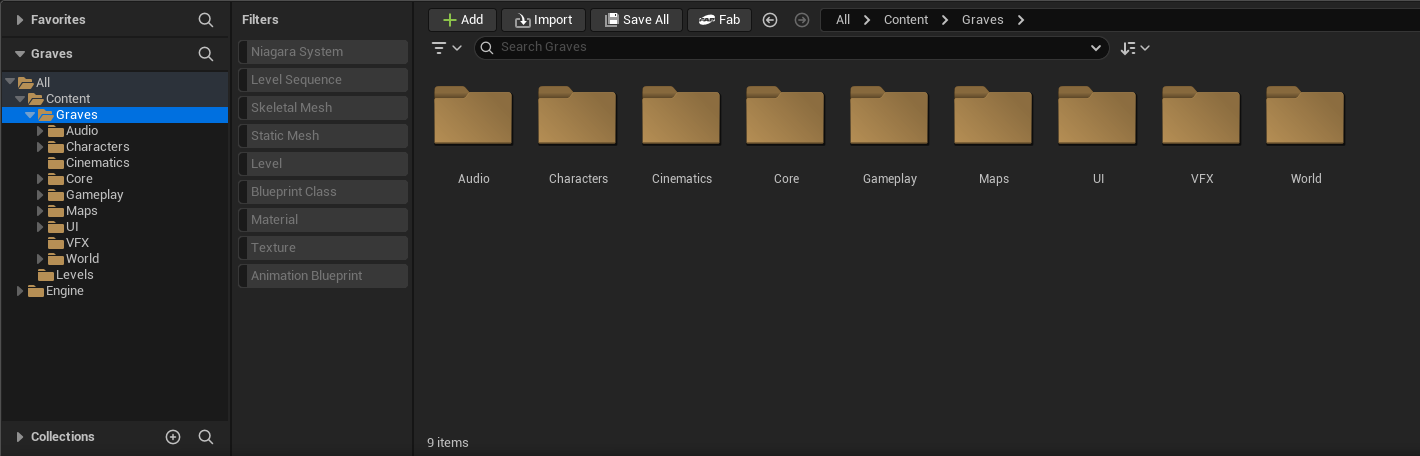
The project-specific folders live together beneath Content/Graves.
Build the following structure. Create the folders first; do not fill them with placeholder assets.
Content/
└── Graves/
    ├── Audio/
    │   ├── Ambience/
    │   ├── Dialogue/
    │   ├── Music/
    │   └── SFX/
    ├── Characters/
    │   ├── NPCs/
    │   │   ├── Animations/
    │   │   ├── Blueprints/
    │   │   ├── Materials/
    │   │   ├── Meshes/
    │   │   └── Textures/
    │   └── Player/
    │       ├── Animations/
    │       ├── Blueprints/
    │       ├── Materials/
    │       ├── Meshes/
    │       └── Textures/
    ├── Cinematics/
    ├── Core/
    │   ├── Components/
    │   ├── Data/
    │   │   ├── DataAssets/
    │   │   ├── DataTables/
    │   │   ├── Enums/
    │   │   └── Structs/
    │   ├── Framework/
    │   ├── Input/
    │   │   ├── Actions/
    │   │   └── Contexts/
    │   ├── Interfaces/
    │   ├── Libraries/
    │   └── Save/
    ├── Gameplay/
    │   ├── Equipment/
    │   ├── Interactions/
    │   └── Objectives/
    ├── Maps/
    │   ├── Dev/
    │   ├── Frontend/
    │   └── Gameplay/
    ├── UI/
    │   ├── Art/
    │   │   ├── Fonts/
    │   │   ├── Icons/
    │   │   └── Textures/
    │   │       ├── MainMenu/
    │   │       └── Splash/
    │   ├── Components/
    │   └── Screens/
    │       ├── HUD/
    │       ├── LoadGame/
    │       ├── MainMenu/
    │       ├── Pause/
    │       └── Splash/
    ├── VFX/
    └── World/
        ├── Blueprints/
        ├── Decals/
        ├── Environment/
        │   ├── Materials/
        │   ├── Meshes/
        │   └── Textures/
        ├── Lighting/
        └── Props/
            ├── Materials/
            ├── Meshes/
        └── Textures/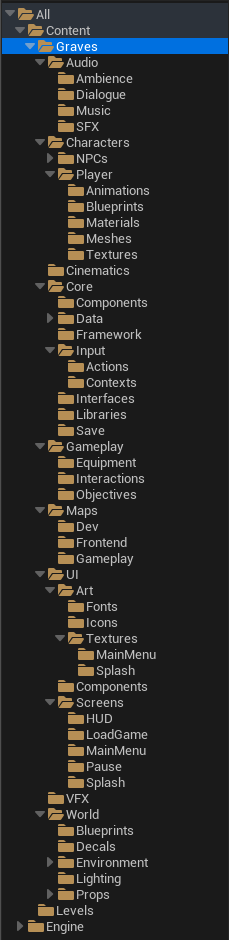
The expanded hierarchy makes the final destination of each asset visible at a glance.
Some branches will remain empty for a while. That is fine. Their purpose is to answer a future question quickly: Where does this asset belong?
Avoid creating extra top-level folders whenever a suitable branch already exists. Consistent paths make migrations, references, searches, and handoffs much easier later.
Discoveries
- Unreal asset paths begin at
/Game, which represents the project’sContentfolder. For example,Content/Graves/Core/Frameworkappears to Unreal as/Game/Graves/Core/Framework. - Moving an asset after other assets reference it may create a redirector. Redirectors are useful during a move, but they should eventually be fixed from the destination folder.
- Vendor content can remain in its supplied folder when preserving its internal dependencies is safer than reorganizing it.
Forge 4 — Separate source files from game-ready assets
Close Unreal before creating a folder beside Graves.uproject named SourceAssets. Reopen the project afterward.
Build this smaller structure on disk:
Graves/
├── Graves.uproject
├── Content/
└── SourceAssets/
    ├── Audio/
    │   ├── Dialogue/
    │   ├── Music/
    │   └── SFX/
    ├── Models/
    │   ├── Characters/
    │   ├── Environment/
    │   └── Equipment/
    ├── References/
    │   └── ConceptArt/
    └── Textures/
        ├── Environment/
        ├── Skies/
        └── UI/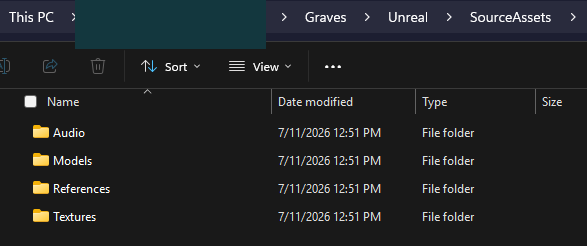
SourceAssets sits on disk beside the Unreal project content and holds editable originals.
SourceAssets is not an Unreal content folder. It holds editable originals, references, exports, and files that may later be imported. Unreal-ready assets still belong under Content/Graves.
This boundary prevents a common kind of clutter: mixing raw images, model working files, and audio sessions into the same folder tree as imported Unreal assets.
Trial — Audit the two roots
-
Content/Gravescontains the Unreal asset structure. -
SourceAssetssits besideContentandGraves.uproject. -
SourceAssetsis not inside the Unreal Content Browser. - No raw reference file has been imported merely to fill an empty folder.
Journey 3 — Establish the First Levels
Forge 5 — Create the startup route
Create and save three Levels:
| Level | Folder | Purpose |
|---|---|---|
L_Boot | Content/Graves/Maps/Frontend | Starts the application and owns the opening transition |
L_MainMenu | Content/Graves/Maps/Frontend | Hosts the main menu |
L_Boneyard | Content/Graves/Maps/Gameplay | Holds the playable Boneyard |
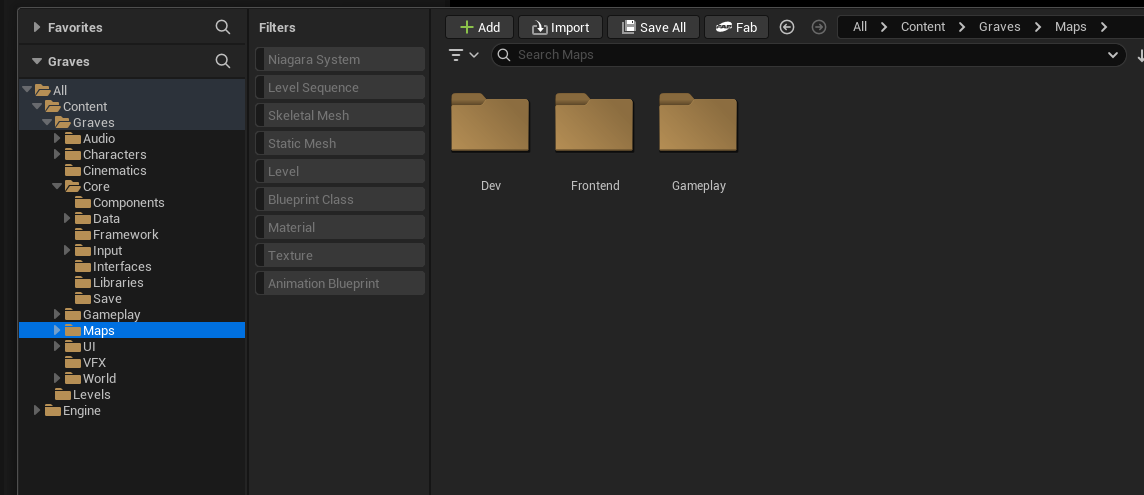
Frontend, gameplay, and development Levels stay separated by responsibility.
Open each saved Level once from the Content Browser. Check the Level name shown in the editor before building anything inside it. A Level can look empty enough to fool you; its name is the reliable answer.
The route will eventually be:
L_Boot → L_MainMenu → L_Boneyard
The Levels exist now, but they do not yet know what gameplay rules to use. That comes next.
Forge 6 — Create the framework classes
In Content/Graves/Core/Framework, create these Blueprint Classes:
| Asset | Parent class | Responsibility |
|---|---|---|
GM_Boot | GameModeBase | Rules for L_Boot |
GM_MainMenu | GameModeBase | Rules for L_MainMenu |
GM_Gameplay | GameModeBase | Rules for playable Levels |
GI_Graves | GameInstance | Data and services that must survive Level changes |
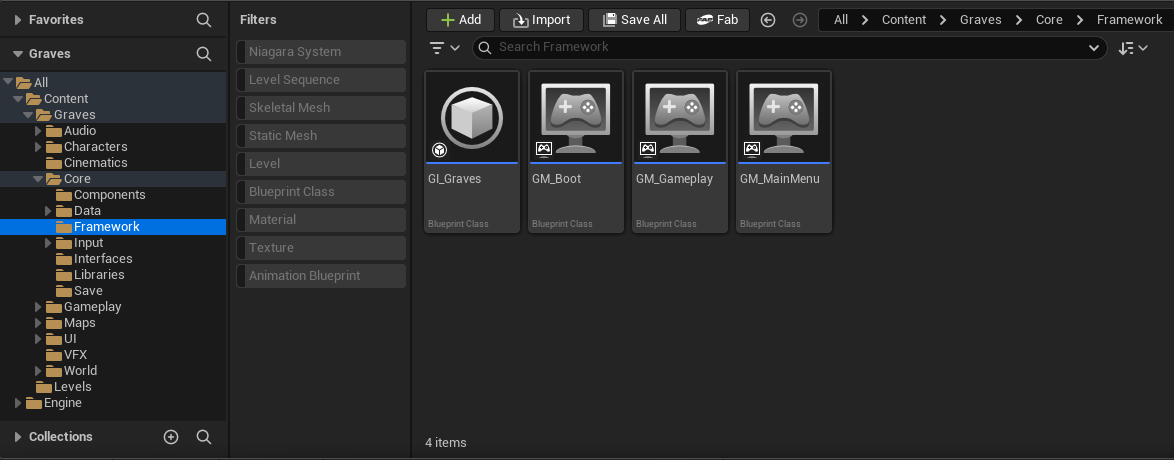
The four framework assets after creation in Core/Framework.
Compile and save each Blueprint.
Open L_Boot, then open World Settings and set GameMode Override to GM_Boot. Repeat the process for the other Levels:
| Level | GameMode Override |
|---|---|
L_Boot | GM_Boot |
L_MainMenu | GM_MainMenu |
L_Boneyard | GM_Gameplay |
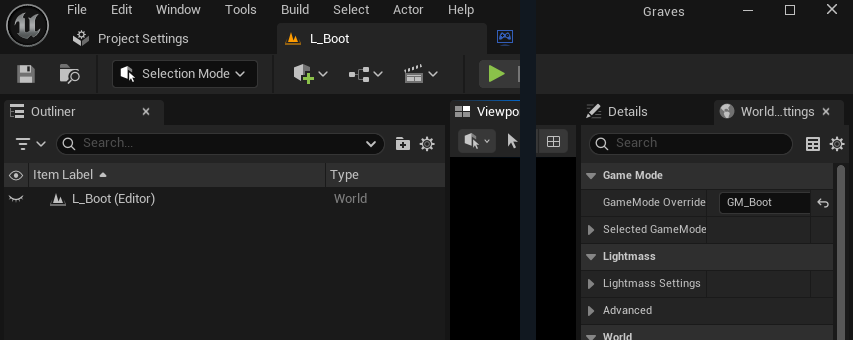
L_Boot using its Level-specific GM_Boot override.
Next, open Edit > Project Settings > Maps & Modes and set:
| Setting | Value |
|---|---|
| Editor Startup Map | L_Boot |
| Game Default Map | L_Boot |
| Game Instance Class | GI_Graves |
Save All, close the editor, and reopen the project. It should return to L_Boot.
Discoveries
- A GameMode defines rules for one kind of Level: default Pawn, PlayerController, HUD, and related framework classes.
- A GameInstance lives across Level travel. It is a better home for truly persistent runtime state than a Level Blueprint.
- A World Settings override lets one Level use a specific GameMode without changing the rules for every other Level.
- Editor Startup Map controls which Level the editor opens. Game Default Map controls which Level a packaged game starts.
- Pressing Play normally starts the Level currently open in the editor. It does not silently return to the configured startup Level.
Trial — Prove the foundation
- Save All and close Unreal.
- Reopen
Graves.uproject. - Confirm that
L_Bootopens. - Inspect the three Levels and confirm their GameMode overrides.
- Return to Maps & Modes and confirm all three project settings.
- Open each Blueprint in
Core/Frameworkand confirm that it compiles without errors.
The Adventure is complete when the project reopens reliably, the asset and source roots are distinct, and every Level knows its place in the startup route. Nothing dramatic happens on screen yet. That is exactly right: this chapter builds the floor beneath everything that follows.