Piper’s movement and cameras deserve a place where failure is cheap. In this Adventure, you will create a separate Unreal laboratory, import the modular character package, preserve its working dependencies, and separate reusable player systems from the Piper-specific pawn without disturbing the supplied original.
The lab is not another game project to maintain forever. It is an instrument: a small, controlled world where character systems can be understood and proven before they travel into Graves.
You will create the blank laboratory first, import the vendor character package, and then inspect the playable Blueprint supplied by that package.
Journey 1 — Create a Clean Character Laboratory
Forge 1 — Start the lab project
Create a new Unreal Engine 5.6 project:
| Setting | Value |
|---|---|
| Category | Games |
| Template | Blank |
| Implementation | Blueprint |
| Target Platform | Desktop |
| Quality Preset | Maximum |
| Starter Content | Disabled |
| Ray Tracing | Disabled, if shown |
| Project Location | D:\Graves\Labs |
| Project Name | PiperCharacterLab |
The resulting project file is:
D:\Graves\Labs\PiperCharacterLab\PiperCharacterLab.uproject
Do not build a custom folder tree yet. The first job is to import the character package intact and learn what it already supplies.
Forge 2 — Import Piper’s stand-in
Open the Content Drawer and choose Fab beside Add, or open Window > Get Content > Fab.
Search for:
Free Casual Girl Sample (Modular)
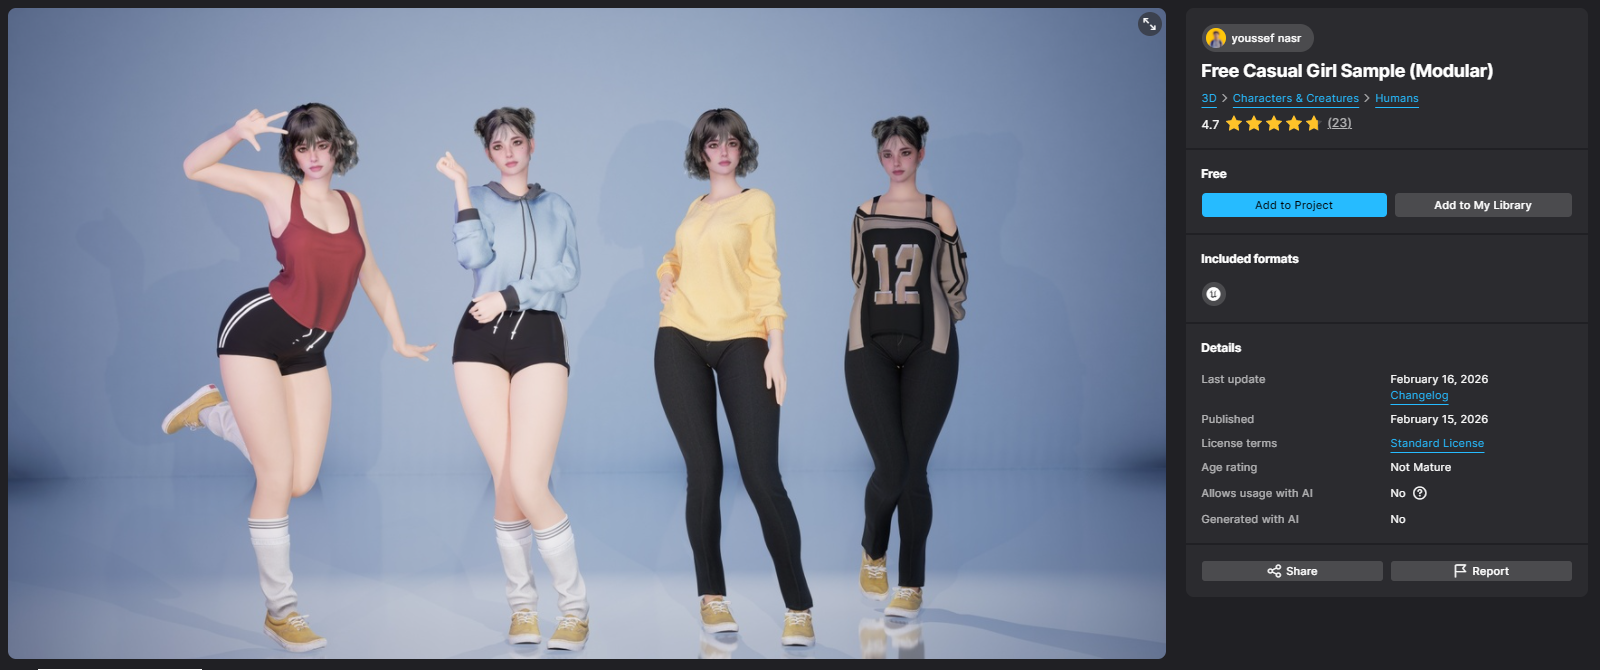
The modular character package in Fab before it is added to the project.
Add it to your library if required, then choose Add to Project. Wait for the download and import to finish completely before using Save All.
The package is expected beneath:
/Game/Sample
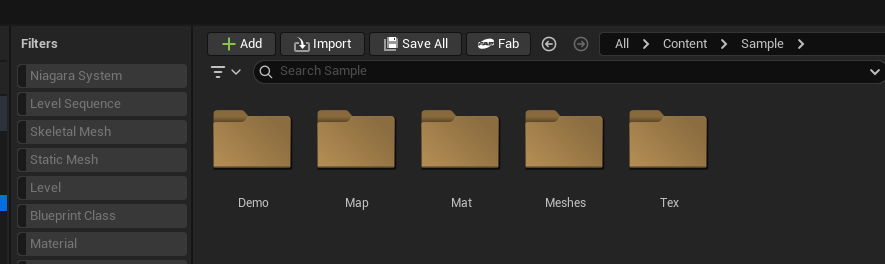
The imported package keeps its supplied folders together beneath /Game/Sample.
Its raw source body is not the playable test character. The package includes an assembled, clothed Blueprint that already carries movement, animation, modular meshes, and a third-person camera.
Forge 3 — Find the supplied playable character
Search the entire Content Browser for:
BP_ThirdPersonCharacter
The expected path is:
/Game/Sample/Demo/ThirdPersonTemplate/ThirdPerson/Blueprints
Open the Blueprint only to inspect it. Confirm:
- The Viewport shows a clothed, assembled character.
- A Capsule Component exists.
- The modular body and clothing meshes exist.
CameraBoomandFollowCameraexist.- The Construction Script contains modular pose-following logic.
- The Event Graph already contains movement, look, and jump input.
Close the Blueprint without changing it.
Discoveries
- A Fab package may contain raw meshes, showcase maps, and ready-to-play demonstration Blueprints.
- An imported example is worth inspecting before replacing. Rebuilding working movement or modular animation would add risk without adding knowledge.
- Vendor assets are safest when their internal names and paths remain intact.
Trial — Confirm the imported baseline
-
PiperCharacterLabopens normally. - The Fab import completes and saves.
-
BP_ThirdPersonCharacterexists at the expected location. - Its Viewport shows the clothed, modular character.
- No custom Graves folders were created before the package arrived.
Journey 2 — Preserve Dependencies and Separate the Player Layers
Forge 4 — Read the Reference Viewer
Right-click the supplied BP_ThirdPersonCharacter and open Reference Viewer. Set:
| Setting | Value |
|---|---|
| Search References Depth | 1 |
| Search Dependencies Depth | 3 |
| Hard references | Visible |
| Soft references | Visible |
Read the graph by direction:
- Assets on the left use the character.
- Assets on the right are used by the character.
- A demonstration map that appears only on the left is a referencer, not a dependency.
- Animation Blueprints, skeletal meshes, materials, textures, and input assets on the right are dependencies.
Do not delete anything during this inspection. The point is to understand the character’s footprint before making an editable copy.
If an intentionally empty folder seems to disappear later, open the Content Browser Settings and check Show Empty Folders. Do not build empty trees merely to make the browser look organized.
Forge 5 — Create the reusable player base and Piper child
Create:
Content/Graves/Characters/Player/Piper
Duplicate the supplied BP_ThirdPersonCharacter with Ctrl+D. Rename the duplicate:
BP_PlayerCharacterBase
Move the duplicate into the Piper folder and choose Move Here. Leave the original BP_ThirdPersonCharacter unchanged.
Enable Filters > Other Filters > Show Redirectors. If the move left a redirector, right-click it and choose Fix Up Redirector. Save All.
Right-click BP_PlayerCharacterBase and choose Create Child Blueprint Class. Name the child:
BP_PiperCharacter
Open the child, compile, and save it. A compact Data-Only Blueprint editor is normal here; do not copy the parent graphs into the child.
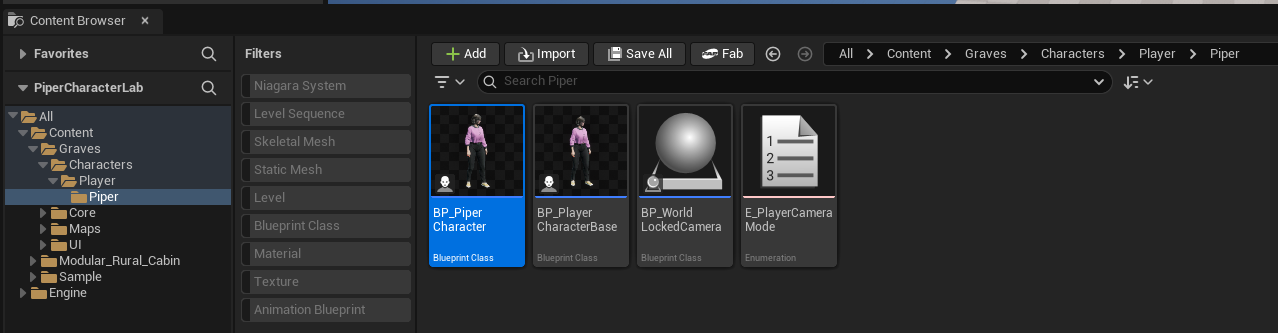
BP_PiperCharacter is the Graves-specific child; BP_PlayerCharacterBase remains the reusable implementation it inherits.
From this point forward, shared movement, camera, input, and interaction logic belongs in BP_PlayerCharacterBase. BP_PiperCharacter remains the game-specific child selected by the lab GameMode.
Do not rename the vendor skeletal meshes, clothing, materials, animations, Input Actions, or Animation Blueprint. They can remain under /Game/Sample until the project deliberately replaces them.
Discoveries
- The duplicate is the editable, reusable player implementation.
- The child gives Graves a Piper-specific pawn without putting her name into every shared system.
- Moving an asset can leave a redirector so existing references continue to resolve. Fixing the redirector updates those references to the final location.
Forge 6 — Save L_PlayerSystems
Choose File > New Level > Basic. The Basic Level provides a floor, light, sky, and PlayerStart.
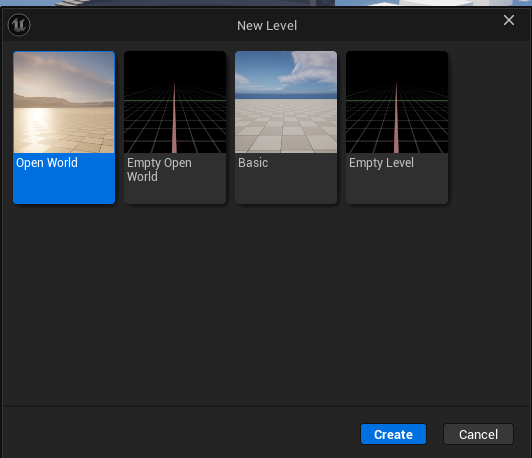
The Basic Level supplies only the environmental pieces needed to begin the test space.
Create:
Content/Graves/Maps/Dev
Save the Level as:
L_PlayerSystems
Keep the existing PlayerStart. Do not place a second one.
Add only geometry that exposes useful character and camera behavior. The accepted test course uses rough spiral stairs and deliberately irregular elevated platforms. It should support:
- Walking and jumping.
- Changing height.
- Approaching walls and overhead surfaces.
- Camera collision.
- Falling and recovering.
It does not need architectural meaning or finished materials.
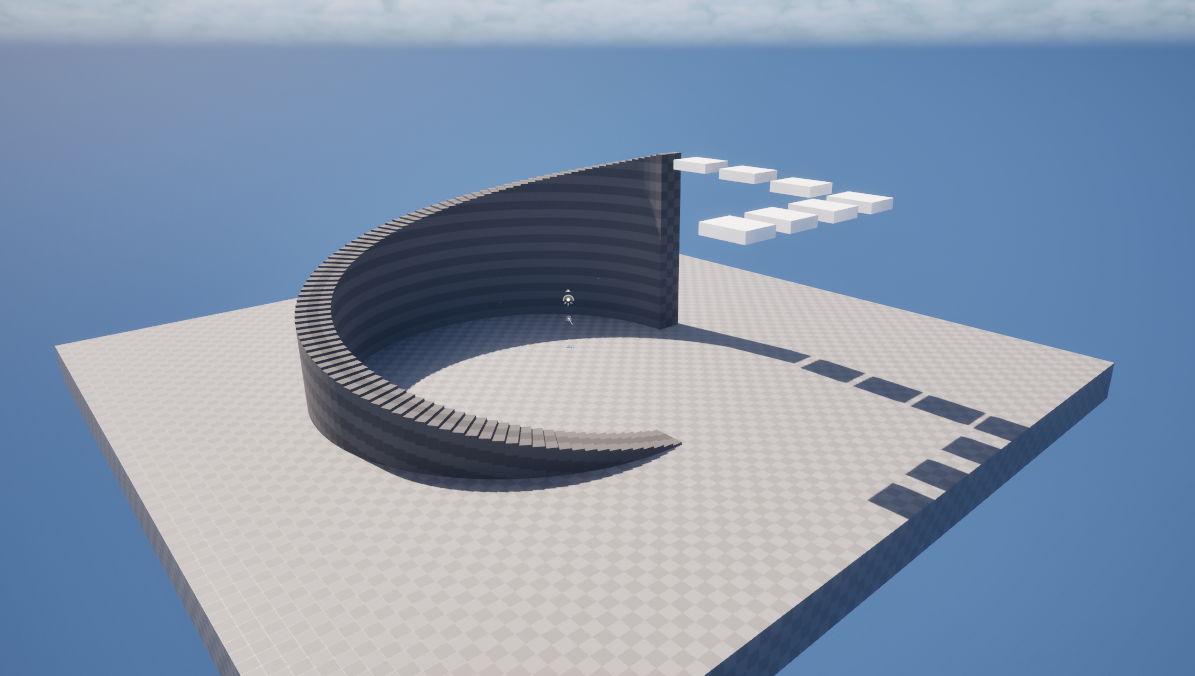
The accepted test course exposes height changes, obstructions, stairs, and recovery space.
Forge 7 — Create the minimal lab framework
In Content/Graves/Core/Framework, create:
| Blueprint | Parent |
|---|---|
BP_PlayerSystemsGameMode | GameModeBase |
BP_PlayerControllerBase | PlayerController |
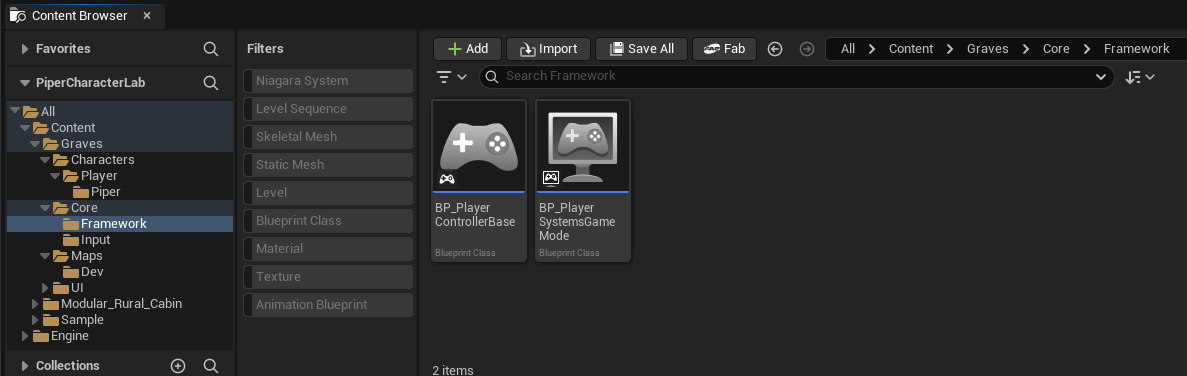
The reusable GameMode and PlayerController live together in the Framework folder.
Open BP_PlayerSystemsGameMode and set:
| Setting | Value |
|---|---|
| Default Pawn Class | BP_PiperCharacter |
| Player Controller Class | BP_PlayerControllerBase |
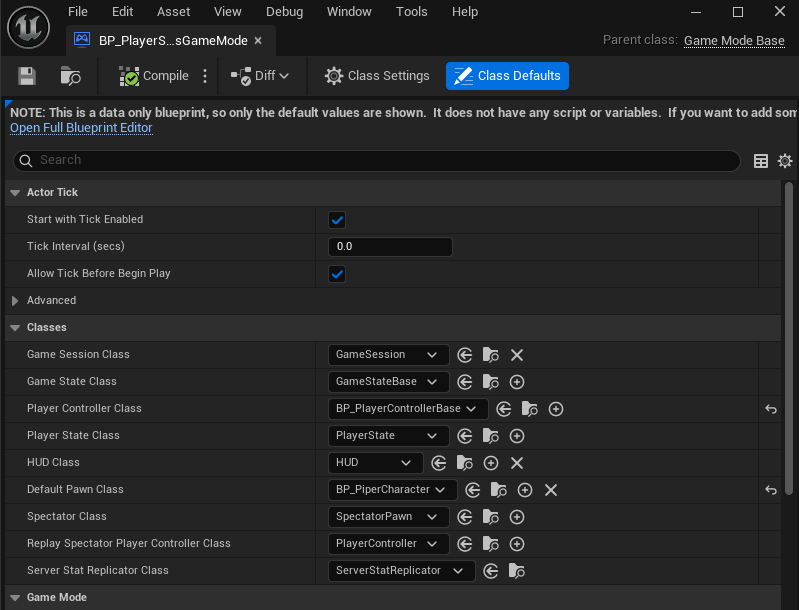
The lab GameMode spawns the Piper child while retaining the reusable PlayerController.
In Project Settings > Maps & Modes, set:
| Setting | Value |
|---|---|
| Default GameMode | BP_PlayerSystemsGameMode |
| Editor Startup Map | L_PlayerSystems |
| Game Default Map | L_PlayerSystems |

The project opens and plays L_PlayerSystems; the reusable GameMode selected above supplies the player framework.
In L_PlayerSystems, leave World Settings > GameMode Override set to None. The project default should apply.
Do not place a Piper Actor in the Level and turn on Auto Possess. The GameMode and PlayerStart should create exactly one character.
Trial — Prove the downloaded behavior before editing
Play in Editor and confirm:
- Piper appears fully clothed.
- Idle animation works.
- WASD movement works.
- Mouse orbit works.
- Jump works.
- Every visible modular part follows the body.
- The supplied third-person camera follows Piper.
- Only one Piper exists.
If movement fails, stop and inspect the package’s existing mapping-context route. Do not rebuild movement preemptively.
The editable character must pass this unchanged baseline before new camera logic begins.
Journey 3 — Establish the Camera Vocabulary
Forge 8 — Create the camera mode enum
In Content/Graves/Characters/Player/Piper, create an Enumeration named:
E_PlayerCameraMode
Add these entries in order:
FirstPersonFreeThirdPersonLockedThirdPerson
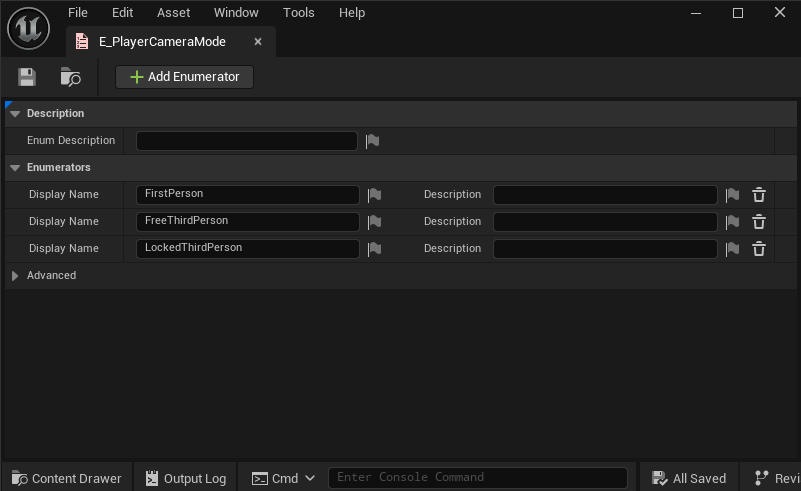
The camera enum records the three durable camera modes in one reusable type.
This enum will be the camera system’s source of truth. A Boolean can answer whether one condition is true; it becomes brittle when three mutually exclusive modes must agree.
Forge 9 — Create the player-systems inputs
Create Content/Graves/Core/Input if it does not already exist. Add these Input Actions:
| Asset | Value Type |
|---|---|
IA_TogglePrimaryCamera | Digital |
IA_ToggleRearView | Digital |
IA_ToggleWorldLockedCamera | Digital |
IA_CameraZoom | Axis1D |
IA_Sprint | Digital |
IA_Interact | Digital |
IA_Drop | Digital |
IA_ResetCable | Digital |
Create an Input Mapping Context:
IMC_PlayerSystems
Add:
| Action | Key |
|---|---|
IA_TogglePrimaryCamera | C |
IA_ToggleRearView | X |
IA_ToggleWorldLockedCamera | V |
IA_CameraZoom | Mouse Wheel Axis |
IA_Sprint | Left Shift |
IA_Interact | E |
IA_Drop | G |
IA_ResetCable | R |
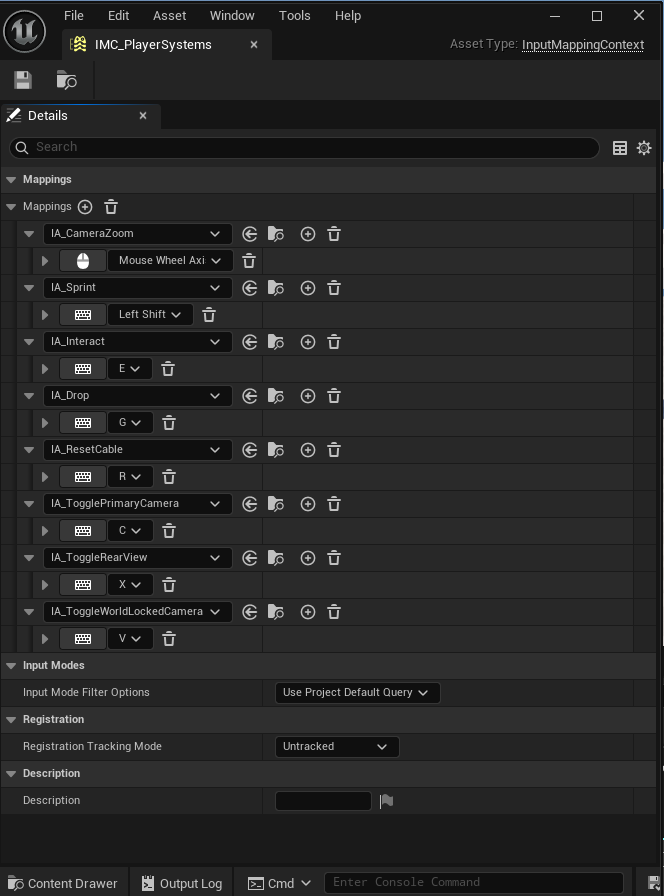
The shared mapping context keeps every reusable Input Action and its current key together.
Several actions will remain unused until later Adventures. Defining them here reserves a coherent control vocabulary; it does not justify adding unfinished graph logic.
Forge 10 — Add the extension context through the PlayerController
Open the Event Graph in BP_PlayerControllerBase. If Event BeginPlay already exists, extend that event. If it does not, add it now. Do not create a second BeginPlay event.
Build the white execution route:
Event BeginPlay
→ Branch
    True:
        Add Mapping Context
            Mapping Context: IMC_PlayerSystems
            Priority: 10
    False:
        unconnected
Add the data wires:
Is Local Controller.Return Value
└──→ Branch.Condition

Enhanced Input Local Player Subsystem.Return Value
└──→ Add Mapping Context.Target
Both getters are pure and have no white execution pins. Compile and save.
Do not remove the imported character’s original mapping context. IMC_PlayerSystems extends the package input rather than replacing it.
Place the route inside a comment titled:
Player Systems Input Setup
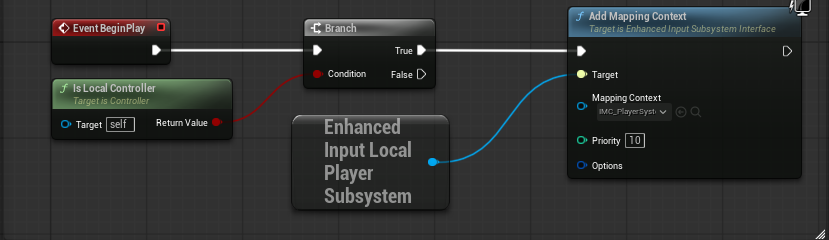
The local PlayerController adds the extension mapping context once at priority 10.
Trial — Preserve and extend input
- The original movement, look, and jump still work.
-
IMC_PlayerSystemsis added only for a local controller. - The context is added once at priority
10. - No imported mapping context was removed.
Journey 4 — Build the Shared Camera Rig
Forge 11 — Create the camera variables
In BP_PlayerCharacterBase, create:
| Variable | Type | Default |
|---|---|---|
CameraMode | E_PlayerCameraMode | FreeThirdPerson |
DesiredArmLength | Float | 360 |
ThirdPersonEntryDistance | Float | 240 |
ThirdPersonMinimumDistance | Float | 180 |
ThirdPersonMaximumDistance | Float | 650 |
ZoomInStep | Float | 55 |
ZoomInterpSpeed | Float | 7 |
FirstPersonVisualThreshold | Float | 80 |
FirstPersonVisualsActive | Boolean | false |
WasFirstPerson | Boolean | false |
LockedToFirstPersonOverlapDelay | Float | 0.03 |
RearViewActive | Boolean | false |
RearViewSourceMode | E_PlayerCameraMode | FreeThirdPerson |
LockedCameraSourceMode | E_PlayerCameraMode | FreeThirdPerson |
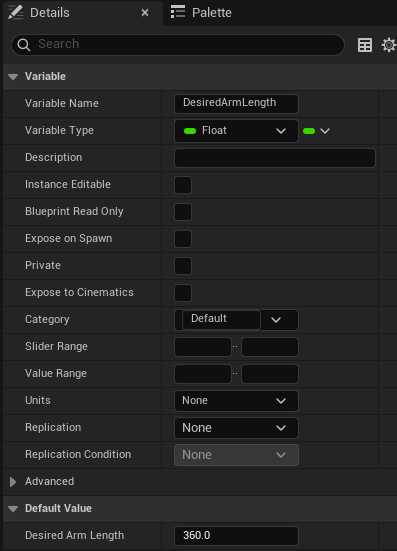
DesiredArmLength begins at the same 360-centimeter distance as the physical boom.
Compile once so Unreal exposes the defaults, then explicitly select FreeThirdPerson for CameraMode. Do not accept the enum’s automatic first entry.
CameraMode, DesiredArmLength, and the boom’s starting length must describe the same startup state. If the camera begins 360 centimeters away while the enum says FirstPerson, the first zoom input will behave as though Piper is leaving a mode she was never actually in.
Forge 12 — Configure the camera components
Select the supplied CameraBoom:
| Setting | Value |
|---|---|
| Relative Location | 0, 0, 0 |
| Relative Rotation | 0, 0, 0 |
| Target Arm Length | 360 |
| Target Offset | 0, 0, 65 |
| Socket Offset | 0, 0, 0 |
| Use Pawn Control Rotation | Enabled |
| Inherit Pitch | Enabled |
| Inherit Yaw | Enabled |
| Inherit Roll | Disabled |
| Do Collision Test | Enabled |
| Probe Size | 12 |
| Probe Channel | Camera |
| Camera Lag | Disabled |
| Camera Rotation Lag | Disabled |
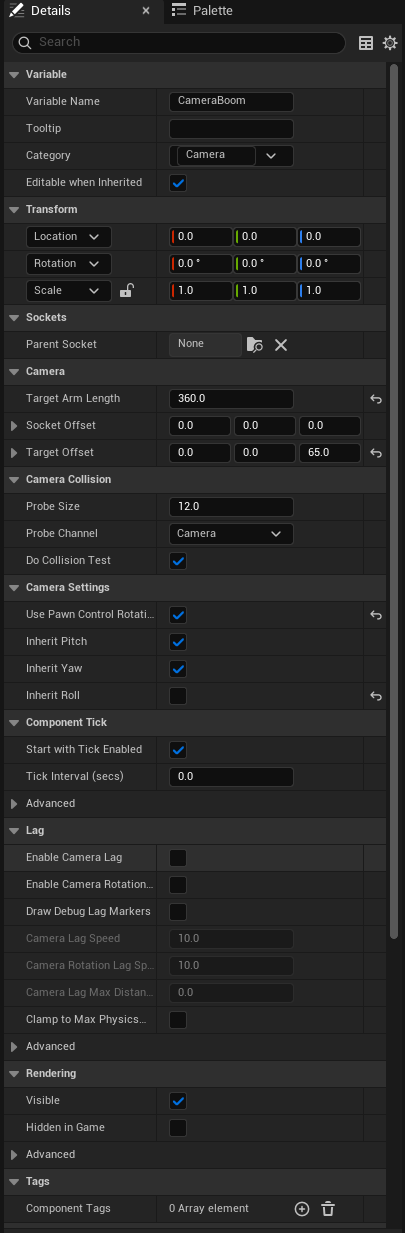
The shared Spring Arm begins at the accepted distance and keeps camera collision enabled.
Select FollowCamera:
| Setting | Value |
|---|---|
| Relative Location | 0, 0, 0 |
| Relative Rotation | 0, 0, 0 |
| Field of View | 90 |
| Use Pawn Control Rotation | Disabled |
Add a Spring Arm as a sibling of CameraBoom beneath the Capsule Component. Name it RearViewBoom:
| Setting | Value |
|---|---|
| Relative Location | 0, 0, 0 |
| Relative Rotation | Roll 0, Pitch 0, Yaw 180 |
| Target Arm Length | 300 |
| Target Offset | 0, 0, 65 |
| Socket Offset | 0, 0, 0 |
| Do Collision Test | Enabled |
| Probe Size | 12 |
| Probe Channel | Camera |
| Use Pawn Control Rotation | Disabled |
| Inherit Pitch and Yaw | Enabled |
| Inherit Roll | Disabled |
| Camera and rotation lag | Disabled |
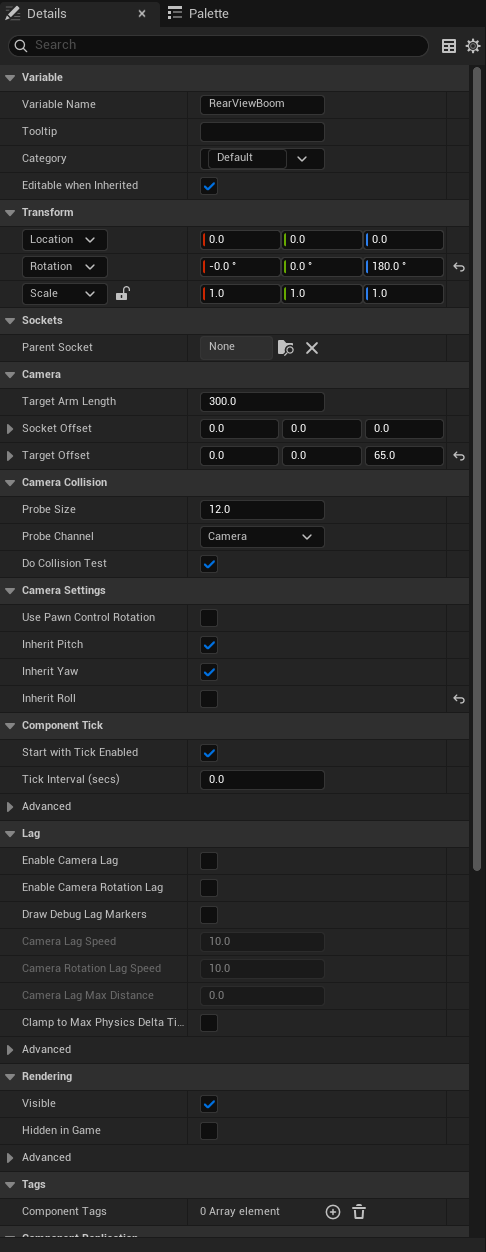
The rear-view boom faces backward, uses its own 300-centimeter arm, and keeps collision enabled.
Add a Camera as a child of RearViewBoom and name it RearViewCamera. Set its relative Location and Rotation to 0, 0, 0, Field of View to 90, Use Pawn Control Rotation off, and Auto Activate off.
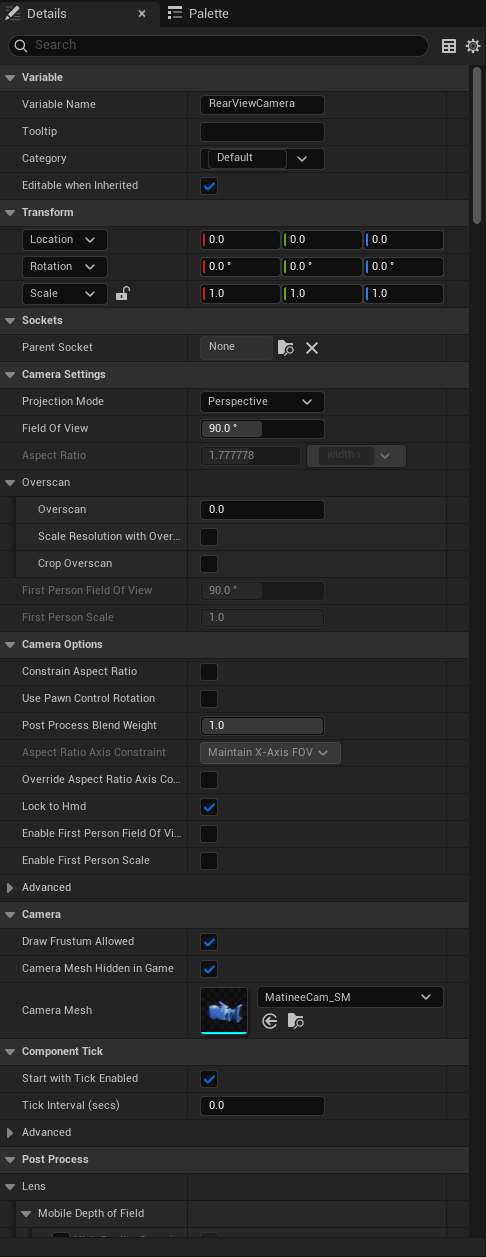
The rear-view Camera remains neutral relative to its boom and does not consume Pawn control rotation.
The component hierarchy should resemble:
Capsule Component
├── Mesh
├── CameraBoom
│   └── FollowCamera
└── RearViewBoom
    └── RearViewCamera
Forge 13 — Smooth changes in arm length
Open the Event Graph. If Event Tick already exists, extend it and preserve its connected execution. If it does not, add Event Tick now. Do not create a second Tick event.
Build this guarded white execution route:
Event Tick
→ Branch
    Condition: CameraMode != LockedThirdPerson
    True:
        CameraBoom → Set Target Arm Length
Feed Set Target Arm Length.Target Arm Length from a pure FInterp To node:
FInterp To
    Current: CameraBoom → Get Target Arm Length
    Target: DesiredArmLength
    Delta Time: Event Tick.Delta Seconds
    Interp Speed: ZoomInterpSpeed
└──→ Set Target Arm Length.Target Arm Length
The enum comparison and interpolation are pure data nodes; neither receives a white execution wire. The enum comparison must be Not Equal (Enum) with teal enum pins. If the second input appears as a numeric byte, delete the comparison and create it again by dragging from CameraMode.
Place the nodes inside:
Smooth Arm Interpolation

Event Tick moves the physical Spring Arm toward DesiredArmLength while the world-locked mode is inactive.
Compile and save.
Discoveries
- The Spring Arm holds a desired camera distance and can retract automatically around collision.
DesiredArmLengthrecords intent; the boom’s current arm length records the camera’s present position.FInterp Tolets those two values approach one another smoothly.- The world-locked mode will use a separate Camera Actor, so the character’s arm interpolation pauses while that mode is active.
Final Trial — Accept the lab foundation
Begin a fresh Play session:
-
L_PlayerSystemsopens and spawns exactly oneBP_PiperCharacter. - Piper remains clothed and animated.
- Imported movement, orbit, and jump still work.
- The camera begins about 360 centimeters away.
- The rear-view rig exists but does not auto-activate.
-
CameraModebegins asFreeThirdPerson. -
IMC_PlayerSystemsis added once. - Every edited Blueprint compiles and saves without error.
The laboratory is ready when the imported baseline remains intact and the new camera vocabulary rests beside it without conflict. The next Adventure turns that vocabulary into the complete camera system.